Brassica is a genus of plants in the cabbage and mustard family (Brassicaceae) also known as cruciferous vegetables or cole crops. The brassica family includes cabbage, kale, mustards, collards, romanesco, cauliflower, brussels, broccoli and others.
STARTING SEEDS & PLANTING
Minimum germination temperature 10°C / 50°F
Sow from early spring to midsummer to give a succession of leaves or curds. Crops such as Romanesco, Broccoli, Cabbage and Cauliflower are best started in modules (cells) with a seedling soil mix. Use cells that are at least 5cm (2in) across to minimize disturbance to the roots while transplanting. Crops such as Kale and Mustards can be direct sown successfully in prepared seed beds.
Sow seeds 1cm deep, sowing two seeds per cell. When thinning seedlings, remove the smaller, weaker one and leave the larger one to grow. We do this by pinching with our nails or with sharp, clean scissors rather than pulling the seedling out so as not to disturb the delicate roots of the other seedling.
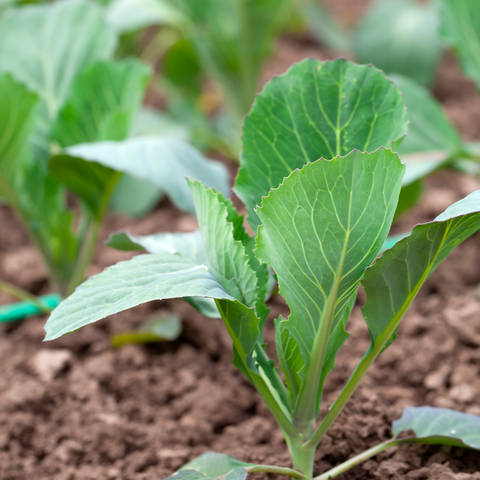
Transplant brassica seedlings out into a prepared garden bed around five weeks from seed. Right after the seedlings have developed their first true leaves and their roots have developed. They might seem small, especially if you’ve gotten seedlings from the nursery before, but smaller seedlings transplant better and grow faster than larger ones that have been kept in their cells or pots for too long. Which can actually cause the plants to become stunted and not develop properly.

Brassica seedlings ready to be transplanted out into the garden
When direct sowing into your garden, make a 2cm deep row with the edge of your hand or your fingers, spacing the rows 4”-6” apart for seeds. We sow brassica seeds densely to harvest the thinned baby greens for salad to take full advantage of our garden bed space. This method gives us nice, thick beds bursting with greens we can cut (harvest) again and again, about two weeks apart. After three harvests of baby greens, start thinning, leaving the biggest, strongest plants to mature into full sized plants.

Brassica seedlings a few weeks after transplanting
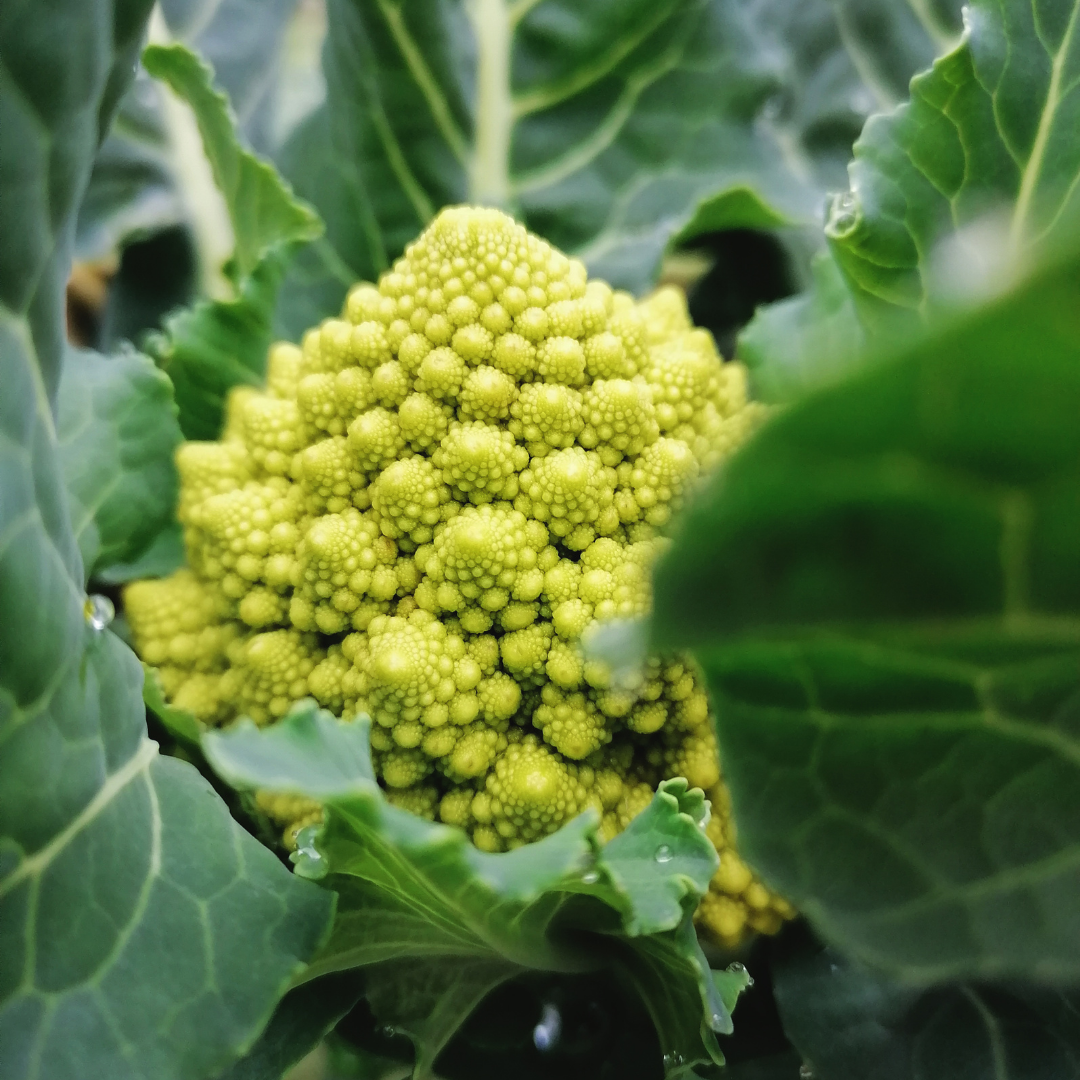
For Romanesco, space your seedlings 18” apart, staggering them diagonally. They need plenty of space for their leaves to properly grow allowing them to develop that gorgeous fractal crown! Broccoli and Cauliflower can be spaced 12-16” apart and Kale 12” apart. You can interplant your Brassicas with scallions, onions, dill, spinach, beets or borage as companion plants.
As the plants grow, they become targets for cabbage butterflies who love to lay their eggs on the undersides of the leaves. Cabbage butterfly caterpillars are notorious for munching on tender, young brassica leaves. Slugs and white fly are other garden pests that love brassicas. Planting borage, dill, calendula, marigolds, chamomile, rosemary, thyme and sage around your crops will help to keep these pests away.
Brassicas are a cold loving crop. They do best in lower temperatures. But don't let that deter you from growing them in warmer climates too! We have grown kale in Brazil and our brassicas held up beautifully through hot summers. However, there are some things you will want to keep in mind. With leafy brassicas like kale, harvest smaller leaves more frequently to keep them tender. In warm weather larger leaves become fibrous and less flavorful. You can also protect your cauliflower, broccoli and Romanesco crowns (heads) by tying the outer leaves together to shade the forming head. Harvest before the curds began to extend upwards and turn purple from the sun. Be patient with Romanesco in warmer climates, it can take upwards of 200 days for the beautiful crowns to form and remember to give them plenty of space! To avoid your brassicas becoming too hot, try planting them in early spring for summer harvest and again in the fall to overwinter.
HARVEST & STORAGE
As you grow brassicas you become more familiar with their growth cycles and peek harvest times. Here are some tips for harvest and storage we learned from farming these crops commercially.
Romanesco
This beautiful plant takes time to develop that mesmerizing fractal crown (but is worth the wait!) Romanesco will become huge, growing enormous leaves (which can be harvested and eaten throughout the growing cycle in moderation) with no signs of head development. Be patient. They will eventually form.
Harvest heads when they are 6”-8” in diameter and still deep within the center of the plant. The heads should be tight and very firm to the touch, bright green with small curds. Cut the head about 4” down the stock. After harvest, we hydro cool* our brassicas by submerging them into very cold water for about 5-10 minutes.
Remove from the water and allow to dry slightly for a few minutes in a shaded area or inside. Traditionally crops like Romanesco and Cauliflower were not cut to harvest, but instead the whole plant was pulled out of the ground and hung upside down in a root cellar. The leaves will droop quickly but the heads can last for months this way. However, since most of us do not have root cellars, we prefer to cut, hydro cool, and store in the refrigerator. They will last much longer if stored in plastic bags, at least a few weeks. You can wrap your fresh vegetables in a tea towel first before storing in a plastic bag. If you are averse to using plastic, be sure to enjoy your vegetable within a few days or the heads will begin to soften and lose their nutritional value.
Cauliflower is harvested in the same way as Romanesco. You want to harvest when the heads are uniform, with tight, small curds. Remove outer leaves for storage. Romanesco is one variety in our Italian Heirloom Seed Collection
*Hydro cooling is a technique used in farming to quickly remove the heat from freshly harvested fruits and vegetables by submerging them in very cold water. This technique rapidly slows down natural respiration, eliminating tissue damage and extending shelf life.
Broccoli

There are a few different ways to harvest Broccoli, depending on the variety planted. If a heading variety, these produce typically one large head or crown per plant. Harvest the head when large but uniform in size with tight dark green or purple buds. Cut the stalk several inches long and hydro cool the heads. If the stalks are tender in the center, they are delicious peeled and fermented in thin slices or used in a stir fry. Broccoli crowns are best stored in the fridge. Consume within 5-7 days.
If you’re growing a sprouting variety of broccoli, (we recommend Purple Sprouting Broccoli) you can harvest the shoots frequently. Cut or break the shoot at the base of the stalk. Hydro cool the shoots and store in the fridge. We like to leave the heading broccoli plant in the garden or field after we harvest the crowns to send out side shoots that are a wonderful little bumper crop. Broccoli leaves are edible and a delicious addition to any meal. Cook them as you would collard greens!
Cabbage

Cabbages are ready to harvest when the heads have fully filled out, but before they split. You can tell if they are ready by squeezing your cabbage head in your hands. Feel for a dense, hard, heavy head. If the leaves still feel empty or light the cabbage isn’t ready for harvest. Check frequently to observe the growing process and to get to know the optimal time for harvest. You can either cut the stalk a few inches below the head to harvest, or pull out the entire plant and store with roots still attached. Depending on the variety, most cabbages can be stored for months in a cool, dark place. You can remove the outer leaves as they age. Fermenting cabbage into sauerkraut or kimchi is also a favorite preservation method of ours.
Kale, Collards & Mustards

These highly nutritious leafy greens can be harvested from baby stage (about 3” tall) all the way through full maturity. The best time to harvest greens is early in the morning, when there is still dew on the leaves. We will bring a bucket filled with cold water out into the garden so we can cut the greens and hydro cool them immediately. This will make your greens last at least an extra week! With large leaves simply take them out of the water, shake them off and store in a plastic bag in the fridge. With baby leaves, we will spin them dry after hydro cooling before storing in a bag in the fridge.
Next up, a nutritional profile on Brassicas and our Guide to Cooking (with recipes), Fermenting and enjoying these delicious and nutrient dense vegetables!
HAPPY GROWING!

