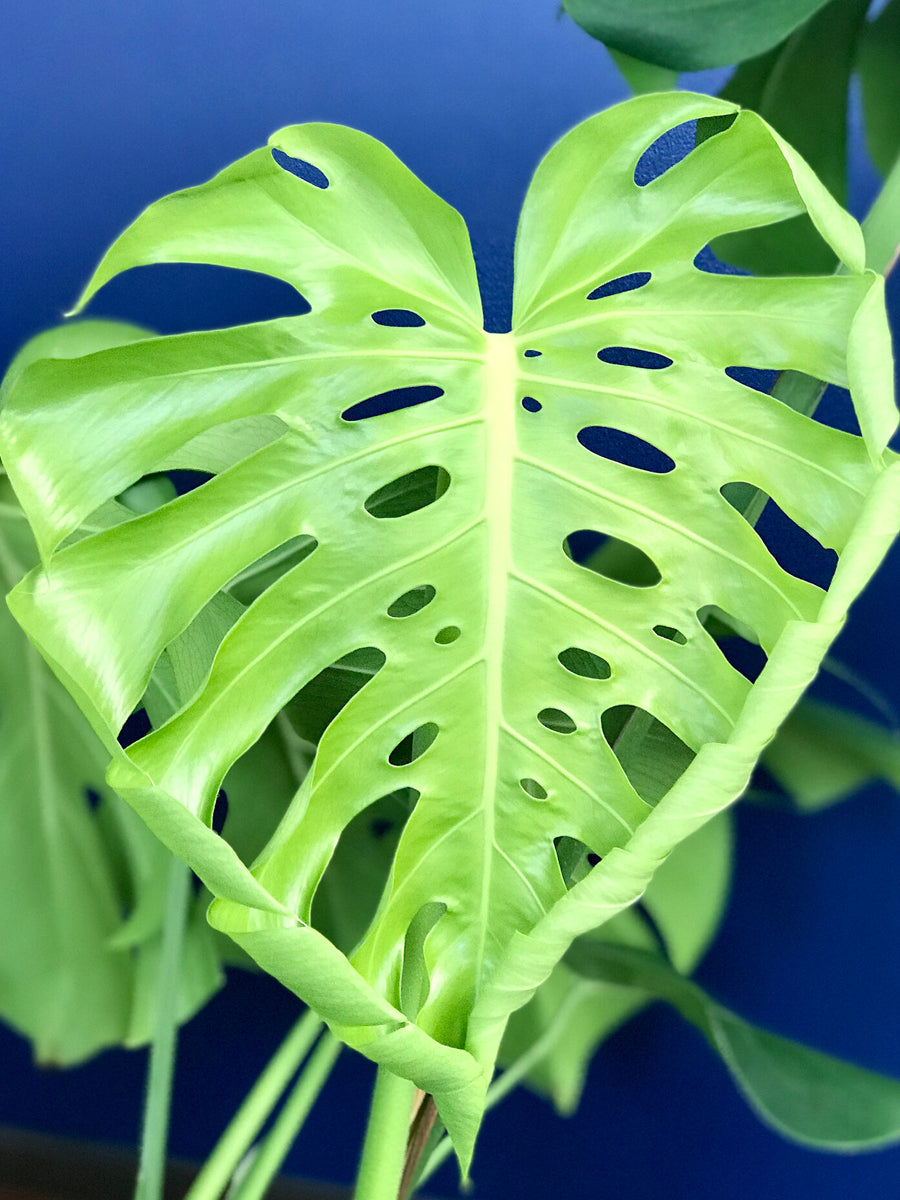
Here are tips from many years of hands on experience growing and caring for Monstera in my home and that of my clients.
Monstera are native to the subtropical and tropical areas of the world, so it makes perfect sense that they thrive best in the most brightly lit and humid environment you can provide them in your home. I find that the leaves grow fenestrations (holes or splits) more readily when they receive very bright, but mostly indirect light or live under grow lights.
Bringing home my first monstera many years ago was thrilling! I was transfixed by the massive, heart shaped leaves and thrilled to add this ‘easy care’ tropical houseplant to my collection of at the time, mostly succulents and cacti. This was the first step in expanding my houseplant parent knowledge and wow did I have a lot to learn!
There’s still nothing quite like the thrill of a new monstera leaf! Many of you have probably seen our time lapse videos capturing the magic of the unraveling new leaf. Such an elegant dance and to witness the movement, growth, unfurling motion and then the gradual darkening to an emerald heart shaped leaf.
I encourage those of you who have a young monstera with little to no fenestration not to be discouraged. You aren’t doing anything wrong! It takes years for them to mature enough to need those little windows! Try adding our Plant Care Tonics to your weekly routine and keep them in brightly lit conditions. A few hours of direct sunlight (preferably not hot summer sun) will aid in the growth of bigger leaves with more (eventual) fenestrations.
Keep them hydrated. Typically I water and feed them with Sacred Soil Tonic every week, more often during the summer months and less during the winter. I also keep a humidifier going during the winter when the heater tends to dry out the ambient indoor air. Ideally the humidity level stays around 55-65% for all of the tropicals in my home (the succulents and cacti don't mind) especially during the winter months. 

Clean those leaves! About once a month I spray the front and backs of the leaves down with our Sacred Leaf Tonic to hydrate and protect those gorgeous leaves.
Monstera also do wonderfully in tight fitting pots with just standard, organic potting soil. I love topping them off with our locally harvested tree moss too. Moss keeps the soil a more bit hydrated and adds a nice aesthetic (unless you are dealing with fungus gnats, in that case I recommend allowing the top two inches of soil to dry out between waterings to discourage fungus gnat larvae growth). I also dress up the soil with rocks or decorative sand for most of my houseplants to give them a nice finished look. But I understand the appeal of just soil, too. Whatever feels right to you and your space, go for it!
Monstera will eventually send out aerial roots in search of water. It’s fun to temporarily keep a mason jar full of water on the floor to allow those roots to snake their way around the jar, simulating a more natural environment for them. I eventually add the roots back into the pot or train them up a pole or stake or just give them the chop.
In the wild, monstera vine their way up trees and allow those aerial roots to dangle beautifully all the way down to the rainforest floor to soak up the moist ground.
Want to make more monstera? Propagation tips:
Step One:
When propagating monstera, the first thing you want to look for is an aerial root. It doesn’t have to be long, it can even be a node or bump, but it must be there in order to root your cutting. I suggest waiting until the cutting has two healthy leaves and an aerial root before cutting.
Step Two:
Using sharp, clean shears or floral cutters, snip the plant JUST BELOW (about 1/2 inch) the aerial root or node at a nice 45 degree angle. Then place in a shaded spot for a few hours to 24 to heal over and then pop it into water.
Step Three:
Change out the water every few weeks, be sure to keep the cutting and water in indirect sun. Wait about one to two months for a robust root system to get established before planting your cutting up a good potting soil. I like using a combination of Rosy's Houseplant Soil and orchid bark in a pot with good drainage.
Step Four:
After planting your new cutting, be sure to water the soil thoroughly and feed with Sacred Soil Tonic. Then, press down gently on the soil to give it a nice firm base to support the root system. Check back in a few days and test the soil by sticking your finger down into the soil an inch or two. If it’s dry, water again. We want to make the transition from water to soil gradually so this first month I like to keep the cutting a bit more hydrated and the soil more moist than usual.
Step Five:
Lessen the water slowly over the next month to watering once a week on average. Feed your plant as described above and enjoy!
Happy growing!
Sending out the love to you all,
Karina and Team SE


